
Windows Shell Tutorial by Cay Horstmann is licensed under a Creative Commons Attribution-Noncommercial-Share Alike 3.0 United States License.
Cay S. Horstmann
Windows Shell
Tutorial by Cay
Horstmann is licensed under a Creative Commons
Attribution-Noncommercial-Share Alike 3.0 United States License.
Downloaded from www.horstmann.com/bigj/help/windows/tutorial.html on December 18, 2012, and modified by Wayne Pollock, Tampa Florida USA
The operating system manages the resources of a computer, such as its internal memory, the disk drives, keyboard, monitor screen, mouse, printers, and network connections. People who use a computer to browse the web or play games have minimal contact with the operating system. Most of their time is spent with application programs.
These users tend to use the operating system only to fix problems, for example with a failed Internet connection. The most recent versions of popular operating systems (such as Windows 8) have become very much oriented towards the consumer, hiding all but the most basic tasks from the casual user.
Computer programmers have more advanced needs than people who use the computer as a tool. Programmers need to compile and launch programs and automate recurring tasks. This tutorial is written for programmers who are already familiar with the basics of using a computer.
If you have prior experience using a computer for playing games or writing reports and are now learning to program, you will need to learn more about your operating system. Some students are reluctant to embark on this effort, either because they feel that they already know how to use their computer, or because they already have their hands full learning about programming. However, that is a short-sighted attitude. Without knowing the operating system, many common programming tasks seem tedious or even impossible.
Operating systems come with two different kinds of user interface:
Most computer users are familiar with the graphical user interface or GUI. Most GUI environments display a desktop that is populated with windows, icons, and menus. You use a pointer (directed by a mouse or trackball) to select items on the desktop. These interfaces are sometimes called WIMP interfaces, after the first letters of the words window, icon, menu, and pointer. Here is a screen capture of a typical WIMP interface:
![[Desktop screen-shot, illustrating a WIMP interface]](WindowsShellTutorial_files/wimp.png)
The other user interface is a command shell. A command shell is simply a window without any graphical decorations. You type commands, using the keyboard, and you see the results of the commands displayed as text. There are no icons, and you can use the mouse only in limited circumstances. Here is a typical command shell:
![[screen-shot showing Windows cmd.exe shell window]](WindowsShellTutorial_files/shell.png)
A command shell is not a good user interface for casual users. However, experienced users find that the command shell is indispensable for many tasks.
Look at it this way. If you just want to snap vacation photos, you'll use a "point and shoot" camera. It requires no training and takes decent pictures.
![[image of a Fuji camera]](WindowsShellTutorial_files/fuji.jpg)
But if you want your photos to be published in a magazine, you will need a professional camera. You will need to spend time learning rather technical concepts such as f-stops and shutter speeds.
![[image of a Hass camera]](WindowsShellTutorial_files/hasscamerapic.gif)
We don't want to leave you with the impression that the command shell is the best tool for every job. Sometimes, you are better off using the GUI, particularly if you spend some effort learning how to use it efficiently. Just like a professional photographer chooses the best instrument for the job, you will need to learn when to use the GUI and when to use the command shell.
In this tutorial, you will learn some tricks that make the GUI faster and more efficient, and you will learn the basics of the command shell.
After you log on to your computer, you see a desktop, which may or may not contain some icons (small pictures representing programs, services, or resources). At the bottom left of the screen is the Start button. Across the bottom, is the task bar which contains buttons for all currently running programs. If you are reading this document in a web browser (and not from a printout), then there should be a button corresponding to the browser program. At the bottom right of the screen is a clock, possibly together with some smaller icons. (This part of the desktop is known as the system tray.)
You probably know how to launch programs by clicking on the start button or on desktop icons. We will now introduce another method.
Type the keyboard shortcut Ctrl+Esc. That is, hold down the Ctrl key, and, without lifting your finger off it, hold down the Esc key. Then let go of both keys (in either order). This keyboard shortcut simulates a click on the Start button.
Why use a keyboard shortcut? It is much faster to hit Ctrl+Esc than it is to
For a programmer, the first step ("grab the mouse") is the most painful. Programmers need to type a lot of code and therefore have their hands on the keyboard most of the time. In this regard, programmers are very different from casual computer users who have a hand on the mouse much of the time.
You will see a popup menu, containing icons and names. The exact layout of the menu depends on the version of Windows and on the customization of the start menu. Here is one example. Your dialog may well be quite different.
![[Windows start menu screen-shot]](WindowsShellTutorial_files/startmenu.png)
In any menu, you can quickly select items that have underlined letters in
their names. For example, typing R is
the same as selecting the
Run item. Typing H
is the same as selecting the
Help item.
 |
NOTE: In some versions of Windows, the underlined letters may not show up until you hit the Alt button. |
Hit the R key now. You will get a
dialog. Type the word notepad.
In most dialog boxes, hitting the Enter key is the same as clicking the Ok button. Typing Esc dismisses the dialog, just as if you had clicked the Cancel button.
Hit the Enter key now. The Notepad
program launches.
| Exercise 1 |
| Which keystrokes are required to launch
the Notepad program without touching the mouse? |
| Exercise 2 |
| What is the advantage of using the Run dialog to launch the Notepad
program? Hint: Locate the Notepad program in the start menu tree. In
which submenu did you find it? How long did it take you to find it?
Will it be in the same position on your friend's computer? |
The next step of this tutorial assumes that you currently have a web browser
running. If you are reading these instructions from a printout, go ahead and
start a browser. Close any windows except for the browser and the notepad
window.
You now have two windows on your desktop: the browser and the Notepad
program. This is an extremely common situation for a programmer. You will often
write a program in one window while consulting documentation in another window.
It is essential that you can switch quickly between the windows, even if some
windows hide others.
The fastest way of switching between windows is the
Alt+Tab keyboard shortcut.
Press Alt+Tab now.
You will get a dialog that lists all windows. Release both keys.
You instantly switch to the next window.
Start the calc(ulator) program (Ctrl+Esc R calc
Enter). You should now have three programs running.
Hit Alt+Tab again, but this time keep
the Alt key depressed and repeatedly hit the
Tab key. You toggle through the program
icons. Let go of both keys when you have reached the browser program.
| Exercise 3 |
| Run three programs, for example, a
browser, the notepad, and the calc program. Switch to the browser
program if it is not currently active (either with the mouse or with
Alt+Tab). Hit Alt+Tab and let go immediately. Which
program is selected now? Hit Alt+Tab again and let go immediately.
Which program is selected now? Why is the result surprising? Why is it
useful? |
When the time has come to close an unwanted window, you can close it by clicking on the X icon in the top right corner, or you can use a keyboard shortcut. There are actually two shortcuts. The combination Alt+F4 closes the active window, but even keyboard enthusiasts will find it hard to remember.
More useful is the Alt+Space shortcut. It brings up the window menu:
![[screen-shot of Windows 'window menu']](WindowsShellTutorial_files/winmenu.png)
Select C to close the window.
The window menu has a number of other useful options:
You can get a minimized window back onto the desktop by cycling to it with Alt+Tab.
| Exercise 4 |
| Suppose you want to see as much
information as possible in your browser window. What keystrokes do you
use to maximize the browser window? |
One of the most common operations for text manipulation is cut-and-paste: transferring information from one place to another. Because these operations are so common, there are special keyboard shortcuts for them.
Switch to the notepad window.
Pull down the Edit menu by typing Alt+E. Note the underlined E in the menu name. You pull down a menu by typing the Alt key and the underlined letter.
![[screen-shot of Windows Edit menu]](WindowsShellTutorial_files/editmenu.png)
The Edit menu has commands for the Cut, Copy, and Paste operations. These operations move (cut) or copy the selection to the system clipboard, or replace the current selection with the clipboard contents (paste). Thus, a perfectly reasonable keyboard shortcut for copying text would be Alt+E C. However, because the copy operation is so common, there is an accelerator, Ctrl+C, which lets you access the operation with a single key combination. You can see the accelerator listed in the menu. Similarly, there are accelerators for cut (Ctrl-X) and paste (Ctrl-V). These key combinations are perhaps not as easy to remember. You may find it helpful to visualize the X as crossing out text, and the V as an insert mark for adding text:
![[analogy of cut, copy, and paste graphic]](WindowsShellTutorial_files/cutpaste.png)
Also note that the letters X, C, V are located next to each other,
conveniently close to the Ctrl key (at
least, on the standard English QWERTY keyboard layout).
| Exercise 5 |
| Now switch to the browser window. If it doesn't currently show a document, then visit your favorite web site. Use the mouse to select a phrase of your choice. Your task is to copy the selected text to the Notepad program, without further use of the mouse. What keystrokes to you use? |
| |
NOTE: Many programs also support alternate keyboard shortcuts: Shift+Delete for cut, Ctrl-Insert for copy, and Shift-Insert for paste. However, these shortcuts are not as universally supported as Ctrl-X, Ctrl-C, Ctrl-V. |
You can move the cursor by clicking on the desired location, and you should do that if the desired location is far from the current location. However, if you just need to move the cursor by a small amount, it is often faster to use the following keys:
![[labeled illustration of standard U.S. keyboard]](WindowsShellTutorial_files/keyboard.gif)
You know that you can select text with the mouse, by clicking on the beginning of the text and dragging the mouse to the end. Indeed, that is often the fastest method. However, if you need to select a short amount of text and your fingers are on the keyboard, then it is useful to know a shortcut.
Hold down the Shift key and move the arrow keys. You will see that a portion of text is selected. You can also use keys such as Home and End to extend the selection to the beginning and the end of a line.
| Exercise 6 |
| Switch to the notepad. It should still
contain some text from a preceding exercise. If not, paste or type a
couple of lines. Now highlight the entire line containing the cursor,
using as few keystrokes as possible. What keystrokes to you use? |
It is handy to know how to move quickly through the fields of a dialog box without using the mouse.
In any dialog box, you can use the Tab key to cycle through all of the fields and buttons. Consider for example the following dialog from the Notepad program. (The menu option is Edit -> Replace.)
![[screen-shot of Windows (notepad) replace dialog]](WindowsShellTutorial_files/replace.png)
Type the Find what entry, then hit the Tab key to quickly get to the Replace with field. The Tab key is particularly handy for dialogs that have many text fields.
When you use the Tab key to cycle
through the dialog box, observe how the
focus shifts from one field to the next.
A text field with focus has a blinking cursor. A button with focus has a dotted
rectangle around the button label. The focus tells you which part of the dialog
box receives keyboard input. For example, if a button or checkbox has focus,
then hitting the Space bar is the same
as clicking it with the mouse.
If an item name has an underlined letter (such as Match case), then you can type Alt together with the underlined letter to reach it quickly. For example, Alt+C is the same as clicking the Match case checkbox.
Finally, most dialogs respond to two special keys. Typing Esc dismisses the dialog, just as if you had clicked the Cancel button. Typing Enter is the same as clicking the Ok button.
| Exercise 7 |
| Open up the Find dialog in Notepad. What keystrokes do you need to find the next occurrence of Hello, with Match case checked? Keystrokes only, no mouse! |
You now know the most common keyboard shortcuts. After a short amount of practice, you will probably agree that the keyboard is mightier than the mouse for many routine tasks.
Occasionally, one needs to type accent marks or other special characters. There are several options for doing this on Windows, depending on the application you are using.
Every character it is possible to type has a number associated with it. Nearly all modern systems use the same set of numbers, called Unicode. If you know the number for the character you want to type, you can enter it even if there's no key on your keyboard for that character. To type one of these characters by number, you need to hold down the “ALT” key, and type the number using the keypad. (It won't work if you use the top-row of numbers on the main part of the keyboard.)
Some of the Alt codes you may find useful are:
| Code | Letter it produces |
|---|---|
| Alt + 160 | á |
| Alt + 130 | é |
| Alt + 161 | í |
| Alt + 162 | ó |
| Alt + 163 | ú |
| Alt + 164 | ñ |
| Alt + 129 | ü |
| Alt + 0193 | Á |
| Alt + 144 | É |
| Alt + 0205 | Í |
| Alt + 0211 | Ó |
| Alt + 0218 | Ú |
| Alt + 165 | Ñ |
| Alt + 154 | Ü |
| Alt + 168 | ¿ |
| Alt + 173 | ¡ |
| Alt + 0169 | © |
When using the ALT codes, if the number shows a leading zero, remember you do need to type that zero.
If you do your word processing in Word, there are some built-in shortcuts. For the letters with an accent mark, (áéíóú) first type Ctrl + ‘, then type the letter you want to have the accent mark. (That is, Hold down Ctrl and press the apostrophe key, then release them and press the letter you want). For the capital letters with an accent mark, (ÁÉÍÓÚ), use Ctrl + ‘, then Shift + the letter.
The same technique can be used to type other accents. For the umlaut (üÜ) use Ctrl + :, then the letter (u or U). You can also use Ctrl + ` (the grave accent, or "back-tick"), Ctrl + ~ (tilde), Ctrl + ^ (circumflex). Other non-vowel letters can be accented when the accented character exists. For example, try Ctrl + , (comma), then the letter "c".
The “Insert” menu (or the tab on the ribbon, if you have a modern version of Office) has an item for inserting special characters into a Word document. You can click on the symbol you want to insert, and that's it.
You can lookup the ALT number for any character using the Windows Character Map tool. You can find this in the Start menu, under “Accessories”. (On Windows 7, look in Start→Accessories→System Tools. Or just type “Character Map” in the Search bar.)
First, select the font you are using. Different fonts support different sub-sets of Unicode. (That is, not all characters are available in all fonts.) Also, be careful of using Symbols or Wing-ding fonts, as they generally don't use the standard Unicode numbers for characters.
After selecting the correct font, use the vertical scroll bar until you see the character you want appear in the table. Then click the character to select it. This will show you an enlarged version of the selected character. At the bottom of the window, there is a status bar that shows for the selected character: the Unicode number in hexadecimal (starting with “U+”), the name of the character (if it has a special name), and the ALT code you can use to type in that character. (The Unicode number in hexadecimal is the same value as the ALT code, which is in decimal.)
The Character Map tool allows you to copy (and then paste) those characters into any document, even if you're not using Microsoft Office. If you need to type accented or other special characters frequently, you can “pin” the Character Map tool to the Start Button, or make a desk-top short-cut for it.
Disk drives for computers come in two main types, removable (flash, CDROM) and non-removable (hard or SSD). In addition to the disk drives that are physically present in a computer, there may be several mapped drives that are provided by the network server. These are not actual drives at all, but look to the operating system (and to you) as though they are.
The drives that hold the disks are named by a letter followed by a colon (“:”). The names a: (and perhaps b:) historically refer to the two the floppy drives early PCs had. The names c: and d: are usually used to name hard disk drives in that same computer. CDROMS, DVD and other removable media drives come next, labeled e: (or d: if there is only one hard disk), f:, and so on. Other letters like h:, s:, ... are mapped network drives.
| |
NOTE: Sometimes, a single physical drive has multiple
partitions. Even though there is only
a single physical drive, it divided into several areas, each of which
has its own drive letter (c:, d:, ...).
(Although rarer on) PCs, you may find two or more disks grouped
together and appearing as a single drive. This may be called RAID,
volumes, or logical volumes.)
If you set up your own computer, it is an excellent idea to set up two partitions, one for the operating system (c:) and one for your personal data (d:). That setup enables you to reinstall the operating system without interfering with your personal data. (Unfortunately, the Windows operating system is notorious for becoming unreliable over time, as more software is installed and programs and drivers interfere with each other. The best remedy is to periodically wipe the c: partition clean and reinstall Windows.) |

|
NOTE: In Linux/Unix/Mac OS X, there are no drive letters. Instead,
removable-media drives are accessed through paths such as
/mnt/cdrom
or /media/flash. |
There are many ways to find drives and view their contents using Windows. The program we will use is called Windows Explorer. (This is not the same program as Internet Explorer, Microsoft's web browser. The Windows Explorer program explores the file system, not the Internet.)
To start the Explorer program, open the Run dialog (Ctrl+Esc, R) and type explorer followed by the Enter key. (Or you can double-click any folder or drive icon.)
![[screen-shot showing Windows Explorer]](WindowsShellTutorial_files/explorer.png)
The look of the Explorer has changed greatly with different versions of
Windows, and it can also be configured in many ways. Don't worry if your
Explorer window looks quite different from this screen shot.
| Exercise 8 |
| List all available drives with their names and drive letters. (You may need to open the My Computer item.) |
Each drive contains files and directories (also called folders). In the Explorer program, click on a drive to see the files and folders. The files are depicted with an icon that looks like a file folder. Files have different icons that depend on their type.
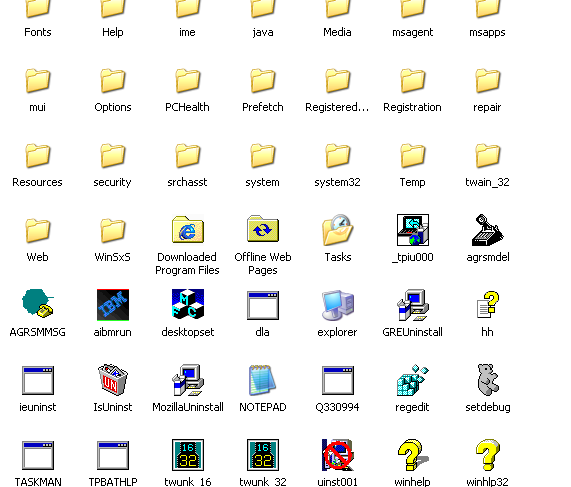
| Exercise 9 |
| List all files and directories that are
inside your c: drive. (Don't look inside the directories.) |
A typical hard disk holds thousands of files. It is therefore essential to organize your files on the disk. As you accumulate files on a disk, you store them in groups by creating directories. Directories are also called file folders, or just folders. Generally, programmers prefer the term "directory", and we will use that term in this tutorial.
Each directory can contain any number of files and other directories called subdirectories (or subfolders). This arrangement is known as a hierarchical or treelike directory structure.
To visualize the hierarchy of directories, it is best to look at the tree view to the left of the Explorer window. Note that each drive has a small box next to it with either a + or - sign in it. This indicates whether the next level of the directory hierarchy is hidden or expanded. Click on the + icon to expand a hidden level, on the - icon to hide an expanded level.
On each drive, the hierarchy starts with the root directory. The name of the root directory is simply the drive name followed by a backslash (such as c:\). The root directory contains files (such as c:\logfile.txt) and directories (such as c:\windows). The windows directory contains other files (such as c:\windows\notepad.exe) and directories (such as c:\windows\system).
The sequence of subdirectories from the root to a given file or directory is called the path. For example, c:\windows\system is the full path name of the system directory inside the windows directory inside the c: drive.
| Exercise 10 |
| List an additional file and an additional directory in the c:\windows directory. List a file and a directory in the c:\windows\system32 directory. Give the full path names for the files and directories. |
| Exercise 11 |
| Find the files explorer.exe and telnet.exe. Give the full path names. (Hint: You may find it easier to look for files if you select the list view rather than the icon view for directories. Choose the View -> List menu option.) |
| Exercise 12 |
| Find a file whose full path names contains at least four directories. |
|
|
NOTE: In Linux/Unix/Mac OS X, directories are separated by forward slashes (/). For example, /usr/local/java/bin. That is the same convention as for web page addresses. Only Windows uses backslashes (\). |
For this part of the tutorial, you need to find a directory into which you are allowed to place files and folders. On your own computer, you can simply use c:\, the root directory of the c: drive. If you work in a computer lab, you will need to find out the name of the directory that was created for your use.
View your directory in the Explorer program. Select File -> New -> Folder (Alt+F W F). This command places a folder icon inside the directory and gives it the temporary name New Folder. It also leaves the cursor in the name field, allowing you to change it immediately. Hit Delete (or just start typing) to erase the name, and give it a new name. A good choice for a name is your own name, contracted to a single word without spaces (such as joe or jqsmith).
If you use your own computer, create this directory now. From now on, place all files in this directory. If you use a computer in a lab and someone else has already given you a directory with your name (perhaps d:\jqsmith or c:\users\jqsmith), then you can skip this step.
We will refer to "your" directory as the c:\yourname directory in this tutorial, even though it will certainly be something else (unless, of course, your name is Yolanda O. Urname...)
| Exercise 13 |
| Create a subdirectory called tutorial inside the c:\yourname directory. (Substitute the actual directory that you created.) List all steps, starting with launching the Explorer program. (Close it first if it is currently running). |
You can use letters, numbers, the underscore (_) and the hyphen (-) character in file names. Obviously, you can't use symbols such as : and \ in file names, or they would be confused with drive and directory separators. There are a few other special characters that you can use, but the details depend on whether the drive is a local drive or a networked drive. It is best to avoid file names with exotic symbols such as !@#$.
You can use spaces in file names, but programmers rarely do that, because spaces in file names create problems when you use a command shell. Instead, use - or _ to separate words: myproject-ver0.01.java or letter_to_fifi.txt.
Both uppercase and lowercase letters are permitted in file and directory names, but Windows will not distinguish between names that differ only in the case of the letters. Windows remembers the case of the name when you first created it, and will always show it that way. But you can use upper- or lower-case letters freely when typing in the name.
| Exercise 14 |
| Create another subdirectory called TUTORIAL inside the c:\yourname directory. (Substitute the actual directory that you created.) What error message does Windows give you? What does it do after you click OK? |
Start the Notepad program: Ctrl+Esc R notepad Enter. Type a few words. Select File -> Save As from the menu. You will get the Windows "Save As" file dialog.
![[screen-shot of Windows Save As dialog, from Notepad]](WindowsShellTutorial_files/filedialog.png)
The dialog suggests a file name *.txt. However, you can't actually use the * character in a filename. Also, the current directory is likely to be wrong. Fortunately, in most versions of Windows, the useless default is also highlighted, so you can overtype it.
Simply type c:\yourname\. (Actually, type the name of your personal directory.) Type the letters s l o w l y and pay close attention to the entry field. You will see that a small menu below the entry field is filled with the names that match what you have typed at this point.

This feature is a great time-saver. As soon as you see the name that matches
what you want to type, hit the Down
arrow button to select it. Presenting all choices that match the typed letters
is called incremental search. Clearly,
incremental search is a marvelous convenience because it minimizes the number
of keystrokes.
| Exercise 15 |
| What choices do you get after you type the letter c (or whatever the drive letter of your personal directory is)? What choices do you get after you type c:\ and the first letter of the directory name? |
|
|
NOTE: Very old versions of Windows do not offer incremental search in the file dialog. |
Save the file as c:\yourname\tutorial\sample.txt. Be sure to supply the extension .txt. That extension signifies that the file is a text document.
| Exercise 16 |
| Close the Notepad program and locate the file that you just saved in the Explorer program. What icon does it have? What name is displayed for the file? What happens when you double-click on the file name? |
Your system has many settings, or options, you can change or adjust. These settings affect the appearance of windows, menus, the desktop, and other items. Settings can change the behavior of mouse actions, or the items that appear in context menus. By changing settings, you can customize or personalize Windows to work the way you want it to.

|
WARNING: Changing some settings incorrectly can prevent the correct behavior of your system. Always be careful when changing settings! Change them one at a time, and make a note of the previous (working) value of any settings you change, so you can restore them later if necessary. |
Settings are changed in different ways, depending on the setting. You may find a program to change a setting, or use the control panel, or just find the setting in a menu someplace. The settings are all saved to one or another file on the disk, called the system registry.
Depending on the configuration of Windows, file extensions such as .txt may not be displayed when you view the file you created earlier in Notepad, in the Explorer program. By default Windows hides the extensions, presumably because naive users are confused about file names such as letter to aunt tilly.txt.
| |
NOTE: Hiding extensions is primarily helpful for virus writers. Many Windows users have eagerly double-clicked on icons labeled something like prettygirl.gif, only to launch a virus program whose real name was prettygirl.gif.exe. |
As a computer user, you don't want the operating system to hide information from you. Fortunately there is a simple setting you can change for this. For Windows 7, fire up the Explorer program. Hit the ALT key if necessary to show the menubar, and select Tools -> Folder Options and select the View tab.
![[screen-shot showing Windows 7 explorer's View options dialog]](WindowsShellTutorial_files/folderoptions.png)
Make sure the check box next to "Hide file extensions for known file types" is unchecked. Click on it if it is checked. Then click Apply. To make this change effective for all folders on your system, also click the "Apply to Folders" button. Then click OK. Make sure to repeat this step on every Windows computer that you use.
For Windows 10, hit the ALT key if necessary to show the menubar, and click on the View tab. Then click the checkbox to show file name extensions:
![[screen-shot showing Windows 10 explorer's View options tab]](WindowsShellTutorial_files/folderoptionswin10.png)
(In Windows 10, you can also bring up the old Windows 7 dialog from the “Options” button.)
Windows uses the file extension to figure out what to do with the file when you double-click on it. Double-clicking on a .txt file brings up Notepad. Double-clicking on a program file (with extension .exe) executes the program.
You can find out which program corresponds to a particular extension and change that if you wish. For Windows 7, open the Explorer program, select the Tools -> Folder Options File Types tab. You get a list of all file types that are registered with Windows. You (or a program that you install) can modify these associations.
For Windows 10, click the start button and then click on the settings button
(“![[a gear with an inner circle]](WindowsShellTutorial_files/win10settingsicon.png) ”). Now click on
“Default apps” to view and change these.
(Hitting the “Reset” button will put these all back to Microsoft's
default values.)
”). Now click on
“Default apps” to view and change these.
(Hitting the “Reset” button will put these all back to Microsoft's
default values.)
| Exercise 17 |
| Which program is associated with the extension .html? Which program is associated with the extension .gif? |
Items such as file and directory icons in the Explorer display have context menus that contains commands directly related to the item. This menu can be displayed by clicking on the object's icon with the right mouse button.
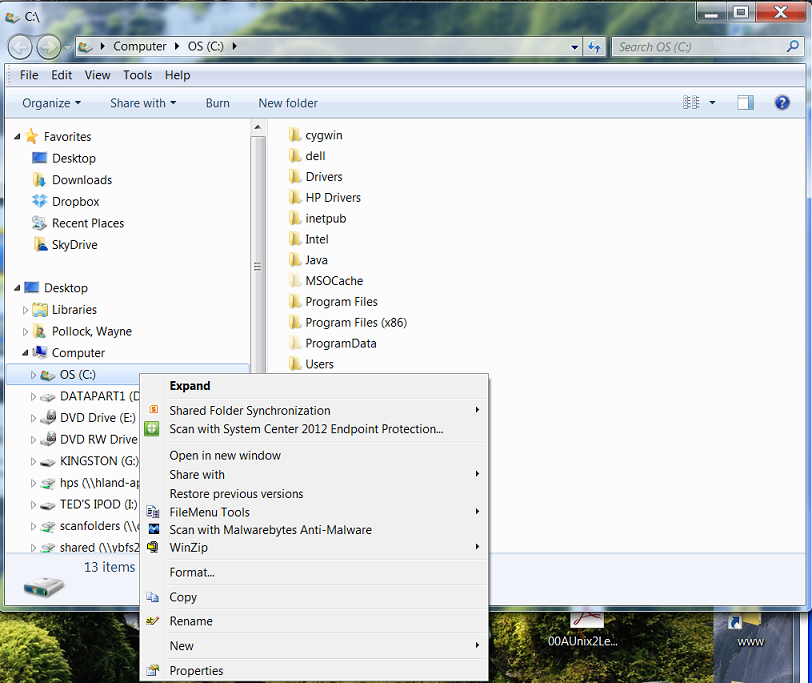
One of the most useful entries in the context menu of a file is Rename. To rename a file, right-click on the file, select Rename and type the new file name.
| Exercise 18 |
| What are the commands listed in the context menu for the c: drive? What are the commands listed in the context menu for the c:\yourname\tutorial\sample.txt file? |
Files and directories often need to be copied. There are two methods for copying files with the Explorer program.
The most intuitive method is drag-and-drop: select a file with the mouse, drag it to another directory, and drop it. If you hold down the Ctrl key while dragging the file, it is copied, not moved.
With some manual dexterity, you can also drag a group of files. To select more than one file, depress the Ctrl button and click on all files in the group. For selecting multiple files with similar properties (such as the same extension, or similar modification dates), you may find it helpful to switch to a tabular view (menu option View -> Detail). Depress the Shift button and use the Up and Down arrow keys to select a contiguous set of files.
The difficulty with drag-and-drop is that both the source and target directory need to be on the desktop. You can overcome that problem by cutting and pasting files. Select the files you want to move or copy. Then select Edit -> Cut (or simply Ctrl+X), move to the directory into which you want to move the files, and select Edit -> Paste (Ctrl+V). To copy the files, use Edit -> Copy instead.
| Exercise 19 |
Copy all files with extension
.txt from the
c:\yourname\tutorial directory into the
c:\yourname directory. What
sequence of keystrokes and mouse operations did you use? (Make sure to
copy the files. Do not move them!)
|
Computers are fairly reliable, but their parts do have a finite lifetime. Also, important files can sometimes be destroyed by careless computer users. You should make it a habit to back up all important files. Your instructor will likely not accept "The computer ate my file!" as an excuse for late or missing homework.
In ancient times, floppy disks were used to back up data. However, floppy disks are actually more fragile than hard disks. Also, the disk drive alignments of different computers can vary, sometimes so much so that it becomes impossible to read a floppy disk that was written on another computer. It is best if you use floppy disks as a matter of last resort. Today, various removable disks (including Flash drives) can be used through the USB port on your computer.
On your own computer, a convenient backup method (as of 2003) is a CD burner. Windows has a rudimentary feature set for burning CDs. You can insert a blank CD, drag files onto it, and burn the CD. However, some computer manufacturers preload software that offers a different interface to the CD burner, and older versions of Windows require a separate programs for CD burning. Since the details vary widely, we cannot review the process in this tutorial.
The best method for backing up your work from a computer lab is an online service such as Dropbox. You can save files on an external server and load them back either onto the same computer (in case you need to restore a lost or corrupted file), or onto another computer (in case you need to move your work between your lab and home computers).
| Exercise 20 |
| Back up the file c:\yourname\tutorial\sample.txt, either onto an online service or onto a flash disk. Describe the steps that you took. Now delete the file and restore it from your backup. What steps did you take to restore the file? |
You have now learned how to navigate the Windows desktop effectively. The final part of this tutorial covers the command shell. You may wonder why you need to learn another method for achieving the same tasks. There are several reasons:
del *.txt
dir *.txt > names.dat
Try doing that in a GUI. If you take a screen capture of a folder display, all you get is a bunch of pixels.
for %f in (*.txt) do jar cvf %f.zip %f
If there are many files to process, such an operation would be very tedious
with a GUI. Many worthwhile tasks are never attempted by
GUI users just because they don't know how to automate them.
Open the Run menu and type cmd
(or command if you use a version
of Windows prior to XP): Ctrl+Esc R cmd
Enter. The command shell window appears:
The command shell has a rather primitive user interface.
Using the command line, you must always type in the command name first. If you want to open a document, you must list the name of the command used to open it, first. Separate the command name from any file name(s) by one or more spaces.
A common issue with those new to the command line is thinking you can type in the name of a file, hit the Enter key, and expect it to behave as if you had double-clicked a filename from the GUI. That won't work in all versions of Windows (and in no version of Linux). Instead, use the application (or utility) name first, then the name of the file you want that application (or utility) to open. For example, to open the file Hello.java using the Notepad editor, type
notepad Hello.java
Typing any of the following won't work, even if the file exists:
Hello.java (This might work.)notepadHello.java Hello notepad Hello Hello.java notepad
Another issue is remembering that the filename always includes an extension.
By default, many versions of Windows won't show the complete filename when
using the GUI.
The final period and trailing letters, known as the extension,
are not shown.
(Instead, the file's icon is supposed to indicate the file's type.)
When creating a file from the GUI, a default extension is usually
added to the name you specify.
From Notepad, the default extension is “.txt”.
So when you save a file with the name “Hello”
or “Hello.java”, you may actually be creating a
file called “Hello.txt” or
“Hello.java.txt”!
The “dir” command will show you the real,
complete filename.
If that name isn't what you want, you must rename the file.
See this Microsoft support note for directions to set Windows Explorer to show or hide file name extensions.
| Exercise 21 |
| What prompt is displayed when you open up a command shell window? |
Often, when a web page or textbook shows a comment to enter, the prompt is
also shown.
While it can be customized, the default prompt shows you useful information,
such as the current default drive letter and working directory.
If you see a prompt in some directions, don't type that in!
For example, if you see the following when instructed to run the
dir command:
C:\Users\AUser\>dir
You should just type “dir”, and then hit the Enter key.
(Nothing will happen until you hit the Enter key!)
If you don't get the output you expected, make sure your prompt is similar
to the one in the example.
Type the command
dir
followed by the Enter key into the shell window. You will see a listing of the files and directories in the current directory.
| Exercise 22 |
| How many files are contained in the current directory? How many directories? |
Now type the command
cd \
Don't forget hitting Enter.
| Exercise 23 |
| What does the prompt string look like now? |
| Exercise 24 |
| What files and directories are contained in the root directory (of the C: drive)? |
Now type
cd \yourname
As always, replace yourname with your personal directory name. If your directory is contained in a drive other than “c:”, you first need to switch to the other drive by typing the drive letter (including the colon) followed by Enter, for example
j:
cd \Users\yourname
Next, type
cd tutorial
| Exercise 25 |
| What does the prompt string look like now? |
Type
cd ..
| Exercise 26 |
| What does the prompt string look like now? |
Finally, type
cd \tutorial
| Exercise 27 |
| What happens? Explain. |
You have just learned the basic directory commands in the shell:
Typing cd plus a path changes the directory to the given path. Here a path can be relative to the current directory or absolute. Absolute paths always start with the root directory (\). Relative paths begin with a file name in the current directory.
There is one special file name that is very useful: the double period
(..) refers to the parent directory of the current directory in
the directory tree, so that it is possible to go up the tree with relative
paths as well as down. Similarly, the filename
. refers to the
current directory, but that abbreviation is not commonly needed.
Typing dir lists files in the current directory. You can also give
dir a relative or absolute path, and it will display the appropriate
directory, such as
dir ..\projects
Most commands you can use allow you to specify many file names on the command line. Such commands get confused by filenames containing spaces; they think you specified two filenames, not one name with a space. (Commands such as Notepad on Windows 7 only accept a single filename, and won't get confused by spaces.)
To instruct the command line that unusual characters such as spaces are part of a file's name, you need to quote such characters. You can do this by enclosing the entire file name with double quotes, for example
notepad "My Data.txt"

cd "\Program Files\Microsoft Analysis Services"
Sometimes, The Windows command line will guess that you meant to quote the name; this is because some commands only accept a single file name as an argument, or don't treat spaces as delimeters. When in doubt, use quotes around filenames with spaces. It is usually best to avoid spaces or other unusual characters in file names.
Some people dislike using the command shell because it is tedious to reissue
commands that were mistyped. Fortunately, it is possible to retrieve and modify
previously issued commands.
Hitting the Up and Down arrow keys cycles through the commands
that you already typed.
| Exercise 28 |
| What command do you see when you hit the
Up arrow key? What command do
you see when you hit the Up
arrow key again? |
| |
NOTE: If the arrow keys don't retrieve old commands and you run
Windows XP, double-check that you are running cmd and not the older command shell. If you have an
older version of Windows, you need to run the doskey program to enable command
line editing. Simply run doskey after you open a command
shell. |
| Exercise 29 |
| Type c and the F8 key. Hit F8 repeatedly. What happens? |
The F8 key performs a search of the previous commands that start with
the text you have already typed. This is often the fastest method for
retrieving an old command.
You can use the cursor keys (Left,Right, Home, End) to edit the line that you called back.
Move the cursor where you want it and insert or remove characters. If inserting
characters types over existing text, hit the Ins key to switch from overtype mode to
insert mode.
| Exercise 30 |
| Type cd \windos (note the
misspelling). After you get an error message, use command-line editing
to fix it to cd \windows.
What are the key strokes that you used? |
Another very useful feature of the shell is filename completion. If you type a part of a
filename and hit the Tab key, then the
first matching file is displayed. Hitting Tab again cycles through all matching
completions.
| Exercise 31 |
| Type cd c:\w and hit Tab. What happens? |
| |
NOTE: Filename completion only works with Windows XP. It does not
work with older versions of Windows. |
Finally, if you look for a command and you don't find what you want, you can clear the command line and start over by hitting Ctrl+C. Indeed, this command can be used to stop almost any action that is still in progress.
The del command deletes a file.
For example,
del sample.txt
deletes the file sample.txt.
| |
NOTE: When you delete a file with the del command, it does not get moved into the trash can. It is deleted for good and cannot be retrieved. |
To copy a file, use the copy
command, followed by the target file or directory. For example,
copy sample.txt sample.bak
copies the file sample.txt and
names the copy sample.bak.
| Exercise 32 |
| How would you achieve the same effect
using the Explorer program? |
copy sample.txt a:\
copies the file sample.txt into
the directory a:\. Because the
target of the copy command is a
directory, the copied file keeps the same name.
To move a file, use the move
command. For example,
move sample.txt a:\
moves the file sample.txt to
the directory a:\, removing the
original.
You can also use the move
command to rename a file. The command
move sample.txt sample.bak
renames the file sample.txt to
sample.bak.
| Exercise 33 |
| How would you achieve the same effect
using the copy and del commands? |
The mkdir command makes a
directory. For example,
mkdir \yourname\homework1
cd \yourname\homework1
mkdir backup
| Exercise 34 |
| Execute these commands. What is the full
path name of the backup
directory that was created? |
You remove a directory with the rmdir command. However, in order to be
removable, a directory must be completely empty. That is, you must first remove
all files and directories that it contains.
You can delete a directory with files and sub-directories if you use the correct
option (switch) with this command.
(Try to find that option yourself!)
| Exercise 35 |
Execute thes commandrmdir \yourname\homework1What error message do you get? How can you remove the directory? |
Often when we want to copy files, we only want files of a certain type (that
is, with a certain file extension). For example, we may want to copy only text
files (with extension .txt). We
use the wildcard notation for this
purpose.
The command
copy *.txt a:\
copies all files whose names end with .txt to the a:\ directory.
| Exercise 36 |
| How would you copy all text files from
the c:\windows directory
to c:\yourname? Why is
this a better solution than the one you found in exercise 19? |
| Exercise 37 |
What does the command del c:\yourname\*.*do? |
The asterisk (*) in the entry *.txt stands for any sequence of characters of any length. (Note how the file extension is given separately.) The other wildcard that is available is ?, which stands for any single character. Here are two more examples of the use of these wildcards:
The string s*.txt matches all files beginning with the letter s and having the extension txt.
The string st??.ba? matches all files beginning with the letters st whose filenames have four characters, and whose extensions consist of three characters beginning with ba.
| Exercise 38 |
Use the dir command and wildcards to
find all files in C:\windows that start with a
w, have three letters, and
whose extension is ini.
What command did you issue, and what matches do you get? |
Many shell commands take options
that modify their behavior.
For example, the dir command
has an option /w that produces a
"wide" listing, with several files in each line. The command is
dir /w
for a wide listing of the current directory, or
dir /w c:\windows
for a wide listing of the Windows directory.
Another useful option of the dir command is /p.
| Exercise 39 |
| Try the command dir c:\windows /p. What is the
effect of the /p
option? |
You can combine multiple options:
dir /w /p c:\windows
In general, an option to a command starts with a forward slash,
followed by a letter. Note that forward slashes (/) are entirely different from
from backslashes (\), which are path separators. Most commands have several
options, which you can find in the online
help.
You can also get a brief description of a command and its options through
the /? option, for example
del /?
| Exercise 40 |
| What are all options of the del command? |
|
NOTE: In Linux/Unix/Mac OS X, you use a dash, not a forward slash,
for options. For example, ls
-a. |
Sometimes, you need to copy information from a command shell window into
another window (for example, to include output in a report or email).
Unfortunately, this process is somewhat cumbersone.
Obviously, this method can only be used to copy a single screen to Notepad
or another application. To get more than one screen, you will need to use
redirection, which is described in the advanced lab.
Conversely, you may want to copy a command from another program (such as a
web browser) into the shell window. Copy the command, then right-click on the
shell window and select the Paste
option.
| Exercise 41 |
Copy this commanddir /oen /p c:\windowsinto the shell window and execute it. What happens? |
To execute a program from the command shell, you type the program name. For example, to launch the Windows Explorer program, type
explorer
You can also provide command-line arguments. For example, to launch the notepad program and edit a particular file, simply specify the file name.
notepad c:\yourname\tutorial\sample.txt
| Exercise 42 |
Execute the commandnotepad c:\yourname\tutorial\myfile.txtWhat happens? Explain. |
When you give the name of a command, then Windows tries to find an program
file with that name. For example, when you type notepad, then Windows looks for the file
notepad.exe. It looks for the
program file in the current directory, then in a set of standard places that
include the c:\windows and c:\windows\system32 directories. If the
program file is not found, then an error message is displayed.
When executing commands with many arguments, the command may not fit easily
onto a single line.
This is also a problem (perhaps more so) when showing command lines in books
or web pages.
Long commands can be split over several lines if necessary.
For non-Windows systems, you end a line with a backslash to indicate the
command continues on the next line.
For DOS and Windows systems, end lines with a caret (“^”):
C:\Temp>javadoc -d docs -private -author -version -noqualifier java.* ^
More? -link http://download.oracle.com/javase/7/docs/api/ *.java
Notice the “More? ” prompt, which shows the line
is a continuation of the previous one.
A line can be broken at any point, even in the middle of a word.
| Exercise 43 |
Execute the commandnotpad(Note the misspelling). What happens? Explain. |
PATH Sometimes, you need to execute a file that is not a part of the "standard
places". For example, if you install the Java compiler, it is installed into a
directory such as c:\jdk\bin. By
default, Windows will not look inside that directory. You can, however, launch
the program by giving the full path name
c:\jdk\bin\javac MyProg.java
A better solution is to modify the setting (or environment variable)
known as PATH.
This setting contains a list of directories in which to look for commands.
In other words, PATH lists the “standard places”.
If you change PATH from the Windows control panel, the change
won't affect any command windows currently open.
To view the current value of PATH, run
path
You can save the output of this command in a file, a good idea before attempting to change the value:
path >PATH-Setting.txt
To add a new directory to the list for the current session only, you can run the command:
set path=C:\jdk\bin;%PATH%
Instead of changing PATH or other environment variables using the command line or Windows standard GUI, you should try a free replacement tool such as Rapid Environment Editor.
If some command line program is taking too long to complete, you can abort it by typing control+C (that is, pressing the control and letter C keys at the same time, then releasing both).
To close the shell window, type the command
exit
Alternatively, simply close the shell window.
| Exercise 44 |
Execute the command
exitWhat happens? |
The command line doesn't usually show scroll-bars. So what can you do if
some command displays so much output, that it scrolls off the screen before
you have a change to see it? You can “pipe” the output into
the more utility, which will pause the display for you, after
each screenful:
help | more
(There are additional ways to combine commands and files, or multiple commands on a single command line. See Command shell overview and Using command redirection operators for a reference to them.)
The number of commands you can run from the command line is almost limitless. Some commands are more useful than others, or are only available from the command line. You can get a list of most of these by typing the command
help
There are references to these commands online at go.microsoft.com/fwlink/?LinkID=91473 and ss64.com/nt/.
Microsoft includes several command interpreters, or shells, in addition to the traditional DOS command line. These include vbscript, wscript, cscript, and PowerShell, among others. wscript is the same as cscript, except cscripts open a console window (or run in one), like DOS scripts. Wscript won't open any console window by default. PowerShell is designed for various heavy-duty (system administration) tasks, that might normally require a GUI application.
This guide only covers basic DOS scripts and commands. However, here are two
examples of wscript, to show a bit of the power of those additional shells.
“wscript” is short for “Windows Script Host”.
It can be used to display messages in a GUI window, change
environment variables, drive-letter mappings, or even registry settings.
Such scripts are text files, generally with the extension
“.vbs”.
Hello.vbs”:
Wscript.Echo "Hello, World!"
To run this example, either double-click on the Hello.vbs file,
or enter its name from the DOS command line. You could use a script like
this, along with the Windows task manager, to pop-up a reminder message at
a certain time. Or you could use such a script to notify you when some
long-running task completes.
example.bat”, without
opening a console window, save the following text in a file named
“Example.vbs”:
CreateObject("Wscript.Shell").Run "example.bat", 0, True
When you double-click this file, it will run example.bat
without opening any console window. This is useful to avoid extra taskbar
buttons, for applications and servers such as Apache Tomcat, Unison,
or MIB Browser, that are launched from batch files. You can
put a short-cut to such wscript files on the Start menu.
For more information about wscript and cscript (among others), see http://msdn.microsoft.com/en-us/library/9bbdkx3k(v=vs.84).aspx (Windows Script Host). For information about PowerShell, see http://msdn.microsoft.com/en-us/library/windows/desktop/dd835506(v=vs.85).aspx, and http://msdn.microsoft.com/en-us/library/windows/desktop/ms714469(v=vs.85).aspx.