You can download JDK 9 instead, but many tools, and IDEs are not currently working well (or at all) with Java 9. Some tools that require Java 8 installed include NetBeans and Glassfish. If you cannot wait and insist on using Java 9 now, you can install Wildfly and not Glassfish, and not NetBeans. Or, you can install both Java 8 and Java 9, and configure your tools accordingly.
This installer includes several sub-installers.
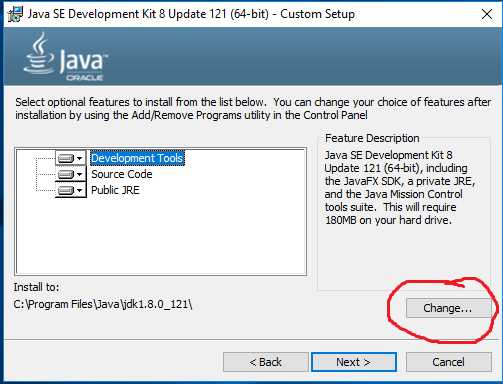
The first one is for the JDK.
Change the install location for JDK to
“C:\Java”,
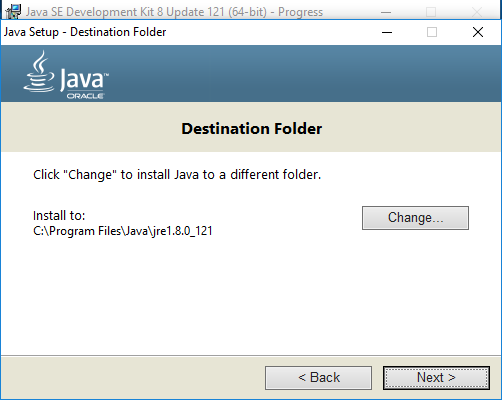
and later you can let the public JRE install where ever it
wants, often in
“C:\Program Files\java\jre
version”.
Install everything.
(Java 8 Samples and demos are currently a separate zip download, and not installed
with the main JDK installer.
However, samples and demos folders are deleted by the JDK
installer for some reason.
So always install the JDK first, then all other stuff.
I strongly suggest downloading the documentation,
to have an off-line copy always available.)
When you use Java's automatic updater for Windows, third-party software may be included. The two additional packages delivered to users in the past include the Ask Toolbar and the McAfee Security Scanner. With Java updates (and sometimes, an install), you must specifically opt out of the additional software installations. You may not want to use Ask.com, but apparently its installer delays its actions for 10 minutes or so. So if you accidentally install it, you won't see the uninstall option show up in the control panel right away.
The first screen-shots below are for JDK 8, but it should be similar for any JDK version. Note the public JRE is left to install in its default location. (Since the installer will adjust PATH for it, there's no reason to change the default anymore.)

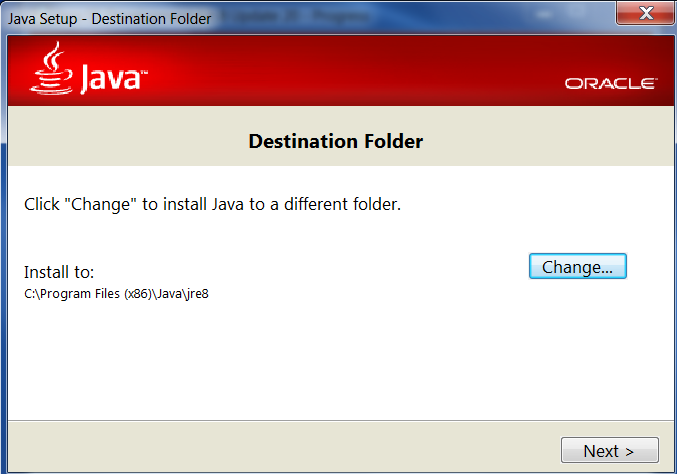
(Note the non-standard location, without version number details.)
Install JDK on Mac OS X
For Mac OS X, there may be a better/simpler way to install the JDK then the Java.com directions for installing Java on OS X. This is because Apple no longer includes Java support, and the Oracle installer doesn't do all the setup required. You can find help by searching the Internet; there are dozens of pages showing how-to setup Java on a Mac. While untried by me, the simplest way may be this:
- Install Homebrew if you don't already have that: visit
brew.sh, copy the long line shown, and paste
it in a terminal window.
Doing this provides you with the
brewcommand to install things. - To update
brewto know about the repositories for Java, run these commands from a terminal window:brew tap caskroom/cask brew install brew-cask
- Now run the command “
brew cask install java”.
After the installer finishes, you should launch the Java Control Panel
and examine the settings.
(On Linux, the command to launch the OpenJDK control panel is
“ControlPanel”.)
I generally turn off automatic JRE updates.
Next,
add localhost to the exception site list
(found in the “Web Settings” tab).
This is a list of sites from which you will allow downloaded unsigned or
self-signed code (Applets or Web Start apps) to run.
You should add a couple of entries to enable running code from your local
computer, and also from wpollock.com if you want to enable
the demos from that website:
http://localhost/
http://127.0.0.1/
https://localhost/
https://127.0.0.1/
file:///
https://wpollock.com/   Add this only if you trust wpollock.com
Only the file:/// entry is needed unless you're
running a server such as a web server, Tomcat, Glassfish, etc., and plan
on serving up Java applets and/or WebStart applications.
In that case, you may need to specify a non-standard port number.
For example, by default the Glassfish server uses port 8080, so you need
to add “http://localhost:8080/” and
“https://localhost:8080/”.
Note that IPv6 isn't currently supported by this exception list;
also the JRE doesn't resolve name to IP addresses,
so you need both the host name as well has the IP addresses
added.
Also note you will get a warning with http: and file:
protocols whenever you use them, since they are not secure;
since you are using localhost it doesn't matter, so you should ignore those
warnings.
It could be unsafe to use http:// for unsigned code from
the Internet however.
On the “Security” tab, make sure to enable Java content in the
web browser, if you want to use Web Start Applications.
(Applets are not safe and deprecated, and likely to go away soon.)
You do not have to do this, as we won't be using Web Start in our course, but
there are some WebStart demos on our class web page.
(If your browser isn't configured for Java, when you click a link for a
JNLP file, you will prompted to pick a program to open the file
with.
Browse to where you installed Java, and select javaws.exe.
On the “Advanced” tab, I enable all debugging options, hide the Java console, disable mixed-code verification, enable TLS1.2 only (should be the default on new versions), and check the box to make the Java icon appear in the system tray (so I can click on it to show the console).
Finally, you can copy some Jar files into the mylib folder
from the JRE/lib folder, although it
is easier to list them on CLASSPATH as shown.
(Indeed, you can list any Jars on CLASSPATH instead of copying
them; this works best when you install in locations without version numbers.)
If you copy Jars, keep in mind you will need to update them when you update
the originals, such as installing a new JDK or Glassfish version.
Download and install the Apache Derby DB, latest official release
zip.
(URL: db.apache.org/derby/derby_downloads.html.)
Unzip Derby and extract the one folder inside to C:\Java\.
Rename that folder to just “db”, to match
the environment settings used earlier.
(The database Jar files (there are several) need to be put on
CLASSPATH in order to compile and run programs using that
database.
This was done already, when you set CLASSPATH earlier.)
C:\Java, and rename the new folder to just
“ant” (that matches the environment variable settings
created earlier).
C:\Java, and rename the new folder to just
“maven” (that matches the environment variable settings
created earlier).
Install Maven on Mac OS X
There are several ways do to this. One is to follow the standard install directions for a Linux-like system, found on the Maven website. But the simplest way seems to be this:
- Install Homebrew if you don't already have that: visit
brew.sh, copy the long line shown, and paste
it in a terminal window.
Doing this provides you with the
brewcommand to install things. - Run the command
brew install maven. - If your version of OS X doesn't include
the
treecommand, you can install that since it is useful. Use the commandbrew install tree.
Not part of the setup, but a note is in order here: If you install Java 9,
Maven will not compile any code unless you change the pom.xml
file for each project, to include these four lines in the appropriate place:
  <properties>
    <maven.compiler.source>1.8</maven.compiler.source>
    <maven.compiler.target>1.8</maven.compiler.target>
  </properties>
(Don't set to “1.9”, since Maven will not compile
your code!)
Those lines can go anywhere between the initial
<project> tag and the final </project> tag,
but not inside of any other tags.
Just above the final </project> tag is fine.
(Hopefully, a new version of Maven will address that problem!)
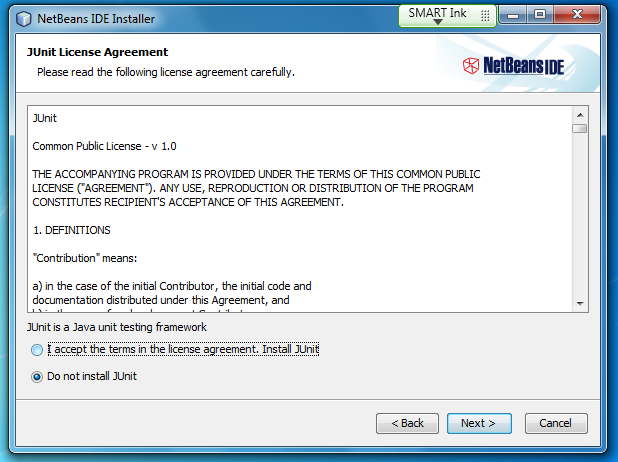
junit.jar”.
You need to download the “jar” and the “javadoc.jar”
for the latest version of JUnit 4 (currently, that is 4.12).
In my browser, that required a right-click and opening the link in a
new tab.
Next, rename “javadoc.jar” to
“javadoc.zip”.
Now you can easily open and extract the contents to a new folder; I used
“C:\Java\JUnit-API”.
You can then set a bookmark (or favorite, depending on your
browser of choice) to the index.html file in there, for
quick off-line reference.
The downloaded
“junit-version.jar” jar file
should be put into C:\Java\mylib.
You can optionally repeat these steps for the
“hamcrest-core.jar” file and its javadoc.jar
file.
(Hamcrest is an extension to JUnit 4.
I suggest extracting the documentation into
“C:\Java\Hamcrest-API”.)
You can also bookmark the online JUnit documentation, from https://github.com/junit-team/junit/wiki and http://junit.sourceforge.net/doc. (This includes the JUnit Cookbook, and the combined JUnit and Hamcrest Java Docs (API). Note the API documentation found here may not be as current as the versions you downloaded.)
JUnit 5 was recently (as of 1/2018) released, and is a major rewrite of the whole system. For now, our class will continue to use JUnit 4. (This document will be updated for JUnit 5 in the future.)
org-json.jar from
Maven Central — search for org-json.
Also download the latest version of gson-version.jar from
Maven Central — search for gson.
Put both Jar files into C:\Java\mylib.
(org.json is an older JSON library that is very simple to use.
Google's gson library is a powerful modern JSON library.)
You can also download the API docs for gson, as a Jar file.
Unzip it someplace to have a local copy of the docs; I used
“C:\Java\GSON-API”.
Instead, I suggest installing the Wildfly server. It does run on Java 9, but it only supports the previous version of Java EE, version 7 (at least for now). That should be more than enough for our class. Wildfly is the popular, open-source Java EE platform formerly called the JBoss AS server.
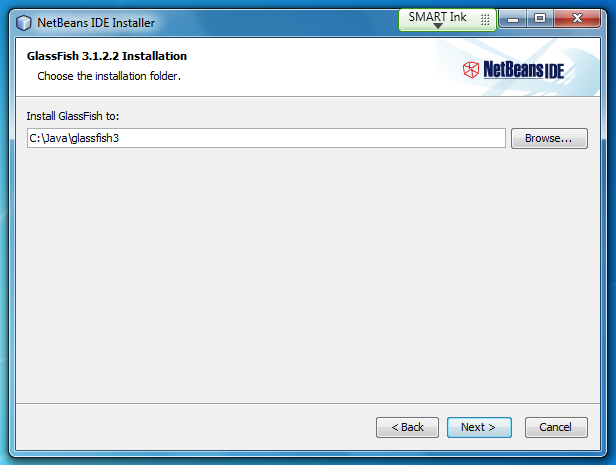
Install the Java EE server you selected. Note! You can skip this step and let NetBeans install Glassfish 4 for you, as shown below. Otherwise, install Glassfish 5 as follows:
To use the Glassfish 5 Java EE server
instead of Wildfly, Make sure you have installed Java 8,
then download the latest open source, multilingual, full platform version.
There are multiple versions, some from Oracle.
I installed the free, open source version from Oracle, which is
named the “Java EE 8 Platform SDK”.
Download the zip (I used the “bundle” that included off-line
versions of the documentation) from
www.oracle.com/technetwork/java/javaee/downloads/.
(Or you can download the FOSS version (also as a ZIP archive) from
https://javaee.github.io/glassfish/download.)
Install it as C:\Java\glassfish;
the default is ...\glassfish5.
This uses the username “admin”, with no password
by default.
You can add a password for better security (and not
“admin” or something equally easy to guess).
At HCC, no password was set.
To use Wildfly instead of Glassfish,
Download the latest ZIP using the link above, and extract the contents
someplace.
I used “C:\Java\wildfly”, to match the environment
variable settings used earlier.
Next, download the Java EE API Jar file
(“javaee-api-version.jar”)
from mvnrepository.com/artifact/javax/javaee-api/.
Click on the latest version for the server you installed
(“8.0” for Glassfish 5 or “7.0” for Wildfly ).
Near the top of the page is a link to the repository with the file,
in this case probably “central”.
Click on that, then download the
javaee-api-version.jar.
Copy the downloaded Jar file into C:\Java\mylib.
(This is needed only to compile Java EE code with
javac.
IDEs download the correct client Jars when you create an
appropriate Java EE project, as will Maven.)
(Optional: You can download the Java EE API
docs as well from that same site, the file
javaee-api-version-javadoc.jar.
Once the docs are downloaded, you can change the extension from jar
to zip, extract the Java docs in a folder someplace such as
“C:\Java\JavaEE-api”, and set a bookmark for
the index.html file for off-line use.)
eclipselink folder
to C:\Java\ (resulting in C:\Java\eclipselink).
(If you install elsewhere, remember to change the ECLIPSELINK_HOME
environment variable.)
Complete the EclipseLink setup by copying the jlib\eclipselink.jar
and the
jlib\jpa\javax.persistence_version.jar files to
mylib.
You can also extract the zipped documentation included, and make a bookmark
in your favorite browser to that.
(Note: You do not need javax.persistence_version.jar
if you have javaee-api-version.jar on the classpath; both
contain the javax.persistence.* classes required.)
The Git for Windows installer offers several choices for various default settings. You can certainly consider changing some of the defaults at this time, but do so only if you know the effects of your change.
If you install both Cygwin and Git for Windows, both Git tools may end up
listed on PATH.
You will probably need to adjust the PATH so all systems use
a single git.exe.
Cygwin's Git tool also may cause problems with file endings, due to the
configuration defaults.
If that happens, either adjust PATH to use the other
git.exe,
or change the core.autocrlf setting for Cygwin's git
to true and see if that solves the problem.
To complete your Git setup, you must configure some settings.
These may be stored in different locations; That means you should
configure the Git settings for each IDE and any other Git
installed (such as Git for Windows).
The settings include your real name, your email address, file encoding
(“UTF-8” is recommended), line endings (see box
above), and other settings you can configure to taste (such as not
hiding the .git directory by default).
C:\Program Files\”),
and add the bin subdirectory to PATH
(“C:\Program Files\visualvm_14\bin”).
The program may not find your JDK, and opens a useless console
window.
To address that, create VisualVM.bat file with the contents:
visualvm.exe --jdkhome "C:\Java" --console suppress
(Be sure to create a short-cut to the .bat file and not the .exe file!)
The tool allows you to add plug-ins.
I added “VisualVM-Extensions”,
“Threads Inspector”, and
“Tracer-JVM Probes”.
   java -version
   javac -version
   ant -version
   mvn -version
   ij NUL
   sysinfo
   java org.junit.runner.JUnitCore
You should not see any error messages.
The JUnit test should show 3-5 lines, starting with the
version, and ending with “OK (0 tests)”
(or some other number, depending on the version).
Run the following only if you installed Glassfish:
   updatetool --version
   echo exit |asadmin
The updatetool command will pop-up a GUI
window showing a version.
The asadmin command line should show something similar to
“Use "exit" to exit and "help" for online help.
Command multimode executed successfully.”
Run the following only if you installed Wildfly:
standalone.bat
This should produce some messages with the word INFO in them,
but no error messages (if running Java 9, you will get many warning messages
however).
You can test your server by opening a web browser to the default URL
for Wildfly, http://localhost:8080/.
You should see the Wildfly welcome page.
Type control+C in that DOS window to stop the server.
To complete the Wildfly setup, click the link that appears “Administration Console”, and follow the steps shown to create an administrator user account. (View a sample session of adding a Wildfly user.)
You may get a message from your firewall software when running some of these tools and servers. (Microsoft firewall may block some out-going connections.) So you may need to enable Glassfish or Wildfly (and JRE) network connections.
If you do get any errors, run the command “set”
(or use the Rapid Environment Editor tool)
and check the values of the environment variables very carefully!
On older versions of Windows, you may have to reboot after changing any
environment variables, and not just open a fresh command line window,
to have the changes take effect.
eclipse”.
Extract it to
“C:\Program Files”.
For convenience, you can make a short-cut to the eclipse.exe
file within the newly installed folder, and put it on your desktop,
quick-launch bar, or the Start menu.
The Windows built-in zip support has a known problem with certain types of archives, such as very deep ones. This results in a failure to completely extract the contents, without any indication of failure. (The symptom is the following error dialog when trying to launch Eclipse: “The Eclipse executable launcher was unable to locate its companion shared library.”) The fix is to delete the damaged eclipse folder, and extract again using another tool such as 7zip, WinZip, or unzip.
(Note, Eclipse may (but may not, depending on your installer) install a duplicate version of some utilities such as Ant and Glassfish4. If you don't install the duplicate versions, the default project settings will be incorrect. But if you do install them, they may not work under Java 9! To use your already installed versions of Glassfish5/Wildfly, ant, JUnit, Maven, etc., you must change the Eclipse defaults to use the ones you installed separately. Keep in mind that the versions of these tools may drift apart if you update one and Eclipse updates the other at different times.)
Tip: Eclipse can be installed on a Flash drive instead. That way, you can carry around your development environment where ever you go. (Make sure to also put your Eclipse “workspace” on the same Flash drive; see below for details on that.)
Run Eclipse to make sure it works.
Make sure it can find your JDK (it
will if you set the environment variables correctly).
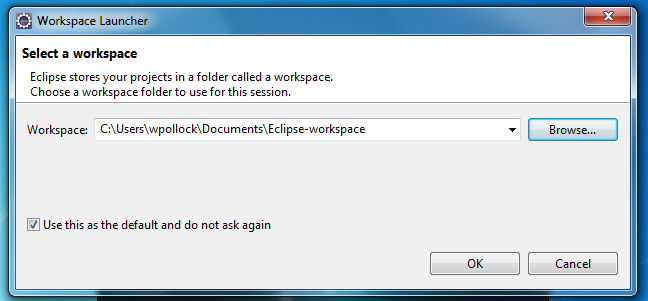
When you first launch Eclipse, it will ask where to create a workspace,
which is a folder that holds all your Eclipse projects.
I usually put that in my Java programs folder (see step 2 above),
or in “My Documents”, and name the new folder
“eclipse-workspace”.
I then check the box to use that as the default and never ask me again.
Under the “Help” menu, run the “check for
updates”.
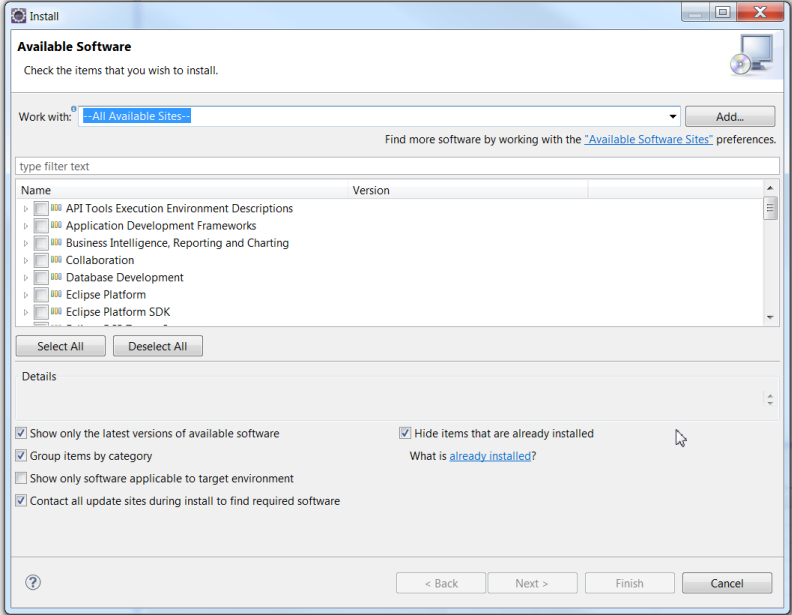
You can also explore what add-ons (plugins) are available by
clicking on the “Help→Install new Software...”,
and install a few if you wish.
First, select “--All Available Sites--” from
the drop-down list at the top.
Then check the boxes at the bottom to show only the latest versions,
to contact all update sites during install, and to hide items already
installed.
In particular, you should make sure the Git client is installed,
from the “Collaboration” list:
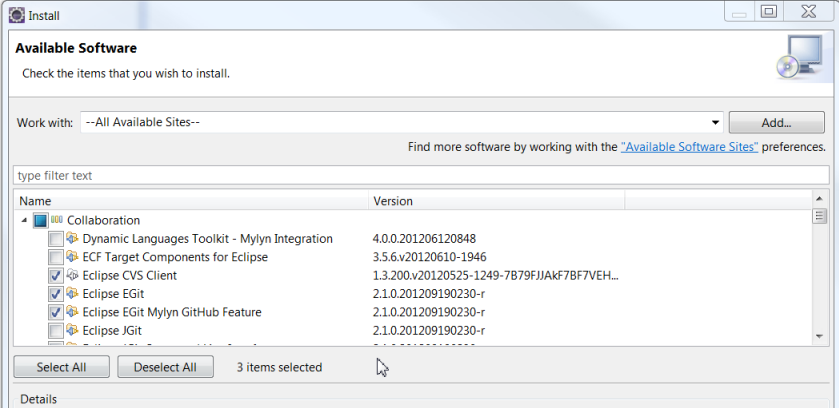
In Eclipse, you want the EGit add-on; the JGit add-on is a library that you can use in your Java programs to have them work with Git repositories. JGit is actually used by EGit internally, and it will probably be installed as a dependency (depends on which version you use). (In modern Eclipse versions, Git is likely installed by default.)
If you get tired of having to right-click your project and choose Team to do anything, you should customize perspective, by enabling the Git command group, then adding the Git menu and/or the Git toolbar. You can also go to “Windows→Show View→Other...” to add the Git Repositories view (I also like the Git Staging view, if your screen size is large enough).
Try creating and running a “Hello, World” application, following the Eclipse docs for that.
When done with the basic install (and you've read the basic Eclipse user manual!), you can “Install New Software...” to add some of Eclipse's optional features. When done with that, explore the Eclipse Marketplace to find and install some very useful add-ons. For example, I installed EclEmma code coverage tool (may be included by default in current versions), SpotBugs (formerly called FindBugs), and others. (You find both of these commands under the Help menu.) Do not go overboard and install too much at first; you can always install more later.
To use Wildfly from Eclipse, you need to install “JBoss Tools” from the Eclipse marketplace. (This is a huge plugin with many parts!) Once that is done, go to the menu Window→Preferences→Server→Runtime Environment. Click on the “Add...” button to add a new server. Select your server (“Wildfly 11 runtime”), and click Next. ... (This section to be completed.)
Install NetBeans by downloading the zip file and extracting the
“netbeans” folder inside, to
C:\Program Files\.
For convenience, you can make a short-cut to the netbeans64.exe
file within the newly installed folder, and put it on your desktop,
quick-launch bar, or the Start menu.
If NetBeans fails to start due to not finding your JDK, you can
tell it where that is.
Launch NetBeans from the command line like so:
C:\Program Files\netbeans\bin> netbeans64.exe --jdkhome C:\Java
The problem may go away after that and a reboot.
If not, you can specify this setting in the file
C:\Program Files\netbeans\etc\netbeans.conf.
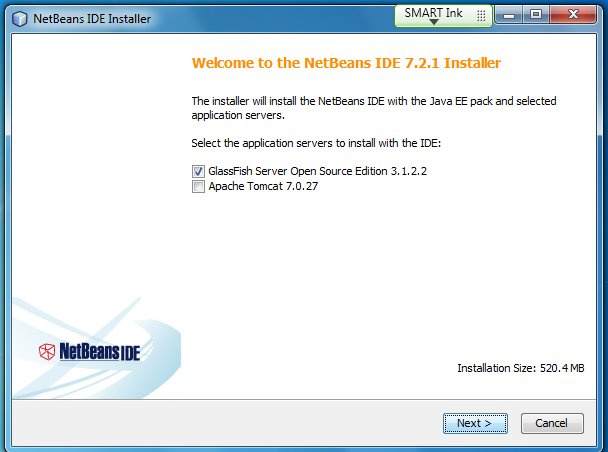
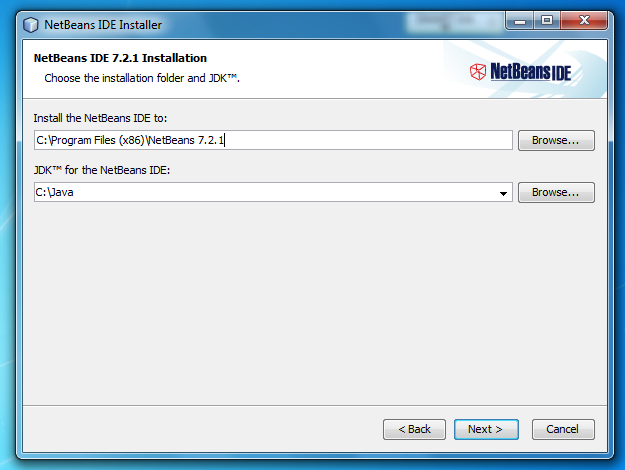
(As with Eclipse, if you don't install the bundled copies of Glassfish4 and other tools, NetBeans won't know about your previously installed versions of those tools, until you update the defaults. As with Eclipse, I recommend using Java 8 and the Wildfly Java EE server, version 10 (not “11”!), which should work well with NetBeans 8.2.)
I don't believe there is any official Apache NetBeans download for Mac OS X at this time, so you can skip this part if you only have a Mac. However, a student showed me a non-standard installer you can try. Follow the directions at github.com/carljmosca/netbeans-macos-bundle. Use this at your own risk.
When done, launch NetBeans (netbeans64.exe) and run the menu item
“Help→Check for Updates”.
After installing updates (and restarting NetBeans), you may need
to update or install additional plugins (“nbjavac library”).
To update or install plugins, use the “tools→Plugins”
menu.
Make sure you install at least Git, if not installed by default (depends
on the version of NetBeans you install).
NetBeans now installs Git and some other versioning system clients by default, so they don't show as plugins.
Try creating and running a “Hello, World” application.
updatetool.exe” tool
(launch from the command line), and install all available updates.
You can also install additional add-ons if you wish.
Then test out Glassfish, by starting the default domain:
asadmin start-domain
This shouldn't show any error messages, except if Glassfish is already
running when you use “start-domain”;
that would be fine.
Finally, open a web browser to the URL
“http://localhost:8080/”.
Explore the server a bit.
Notice you can run updatetool from there.
Click the link to go to the “Admin Console”, and
explore that.
See if you can figure out how to download and install sample applications
from there.
When done exploring for now, you can shut down the Glassfish server with:
asadmin stop-domain
